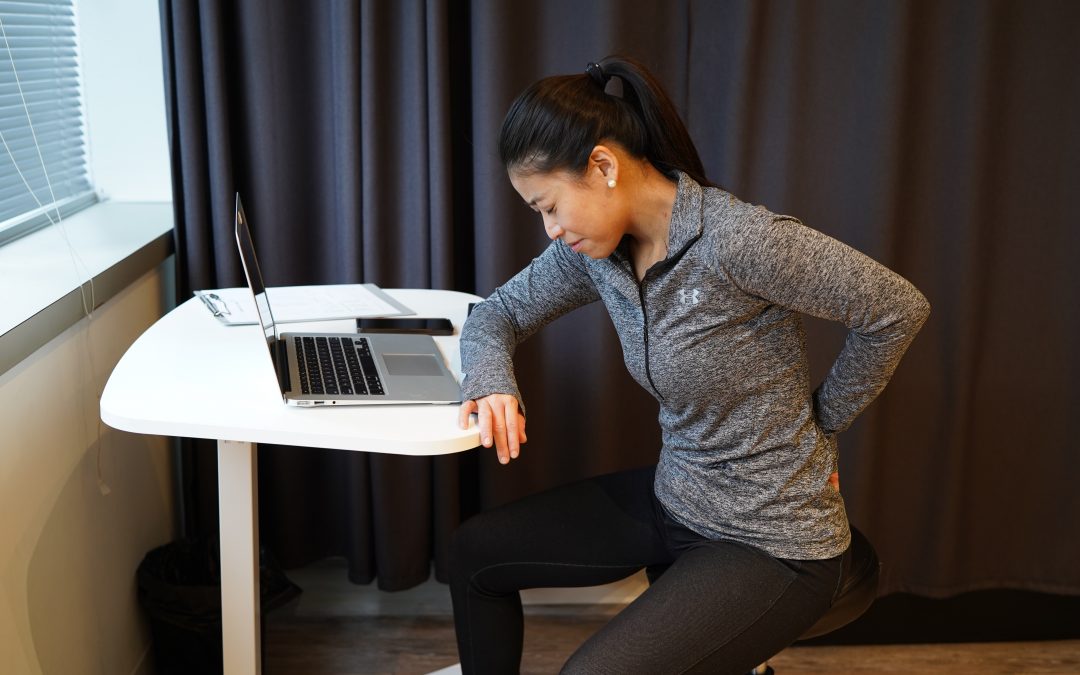
Lower back pain is one of the most common health issues that we treat at Nexus Massage & Rehab. Due to COVID-19 and our work-from-home lifestyles, people spend over 9 hours a day sitting. Sitting too long with poor ergonomic posture can lead to weak muscles and result in lower back pain. Below are 5 quick and effective physiotherapy exercises you can do right now to relieve your lower back pain.
Human bodies are made to move.
The top 3 lower back pain complaints from our patients are general lower back muscular tension and stiffness, sharp lower back pain, and lower back pain that shoots down the legs.
Seeing a results-driven health professional is the most effective way to restore your body.
There are also simple exercises that will help you recover. You can perform these exercises anywhere. They are free and require zero equipment.
Common Causes for Different Types of Lower Back Pain
1. General lower back pain
General lower back muscular tension or stiffness is the most common form of lower back pain that we treat here at Nexus. Patients who work from home are often hunched over their desks for hours. Many professionals suffer from poor desk and home office ergonomics.
If you have general lower back pain, the good news is that the 5 easy physiotherapy exercises below will help you recover quickly and effectively.
Other causes for general lower back pain:
- Sitting too long with no breaks.
- Post-exercise soreness and delayed onset muscle soreness (DOMS).
- Not sleeping well.
- Sleeping with poor posture.
How to quickly relieve general lower back pain:
While physiotherapy exercises are helpful, the fastest way to rid yourself of general lower back pain is to see a health professional who will create a personalized plan to optimize your recovery process.
All health professionals at Nexus Massage & Rehab are trained to help, but we recommend seeing a registered massage therapist or acupuncture provider for fast relief of general lower back pain.
2. Sharp lower back pain
Sharp lower back pain is often caused by sudden, abrupt motions as well as physical activity. A common scenario is feeling sharp lower back pain after reaching forward too quickly to grab something.
Other causes for sharp lower back pain:
- Doing a lot of lifting.
- Sleeping poorly on a non-supportive mattress/couch.
How to quickly relieve sharp lower back pain:
To rid yourself of sharp lower back pain, the quickest way may be chiropractic or acupuncture treatment.
3. Lower back pain that shoots down the legs
This type of lower back pain usually happens because of physical activity. Bending forward to pick something up from the ground can result in sharp lower back pain that shoots down the legs. Another common cause is when you twist your body to grab something.
How to quickly relieve pain that shoots down the legs:
For treatment of lower back pain that shoots down the legs, there are many options available. Chiropractic, physiotherapy, acupuncture, or laser therapy can be effective depending on your specific needs and preferences.
5 Quick Physiotherapy Exercises for Lower Back Pain
Here are 5 free, simple exercises that you can do right now to relieve muscular tension and stiffness. These exercises are easy and require no equipment. I usually recommend these exercises to my patients suffering from general lower back pain.
Patients are often surprised at how the pain that they felt would never go away suddenly disappears. Many have felt the pain for so long that they don’t remember what it’s like to live loose and pain-free.
(Note: For sharp lower back pain and/or lower back pain that shoots down the legs, different sets of exercises are required. Check out the services we offer to find the right treatment for you.)
1. Abdominal Hollowing
Purpose
To isolate and target reactivation of the transverse abdominis muscle (TVA).
Step 1 (Set Up):
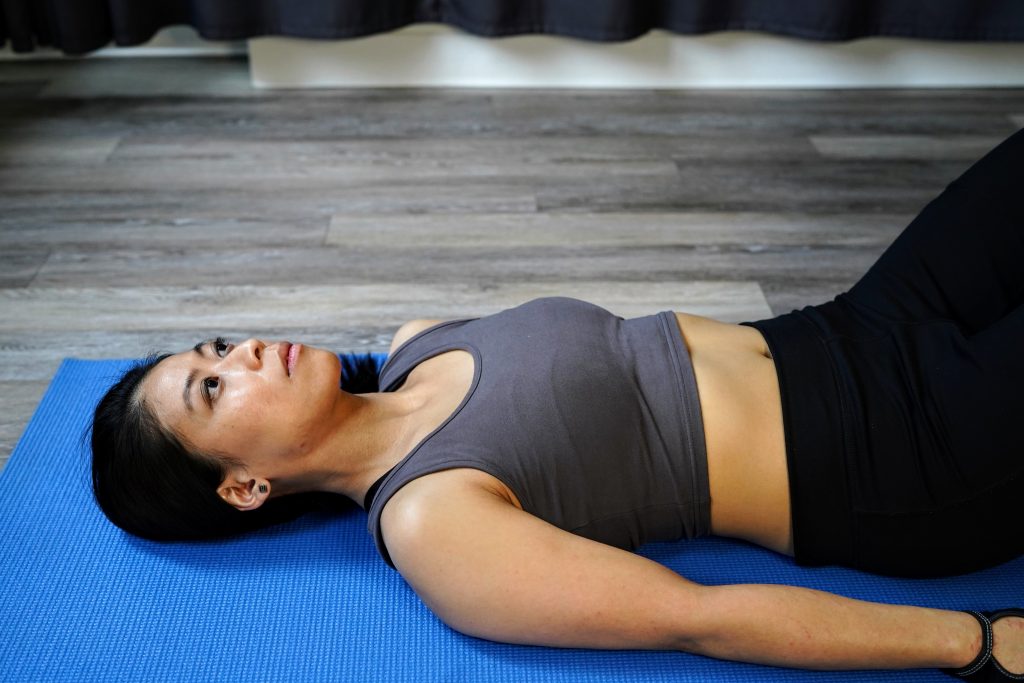
Lay flat on your back. (Note: You can also do this standing or sitting.)
Step 2 (Draw and Hold):

Draw your belly inwards towards your spine (sucking in your navel/belly button). Continue breathing normally. Hold for 7 seconds.
How often?
Do 10 reps x 3 sets daily.
Keys to success:
- Put palms on the front aspect of hips (bony area).
- Feel the muscle activate when drawing in the belly button.
Common mistakes when performing the exercise:
- Some people brace instead of sucking in their belly button.
- People often forget to breathe during the exercise.
2. Cat-Camel
Purpose
Target all the joints in the spine to improve dull spinal mobility.
Step 1 (Set Up):

Start on all fours. Everything at 90 degrees.
Step 2 (Camel):
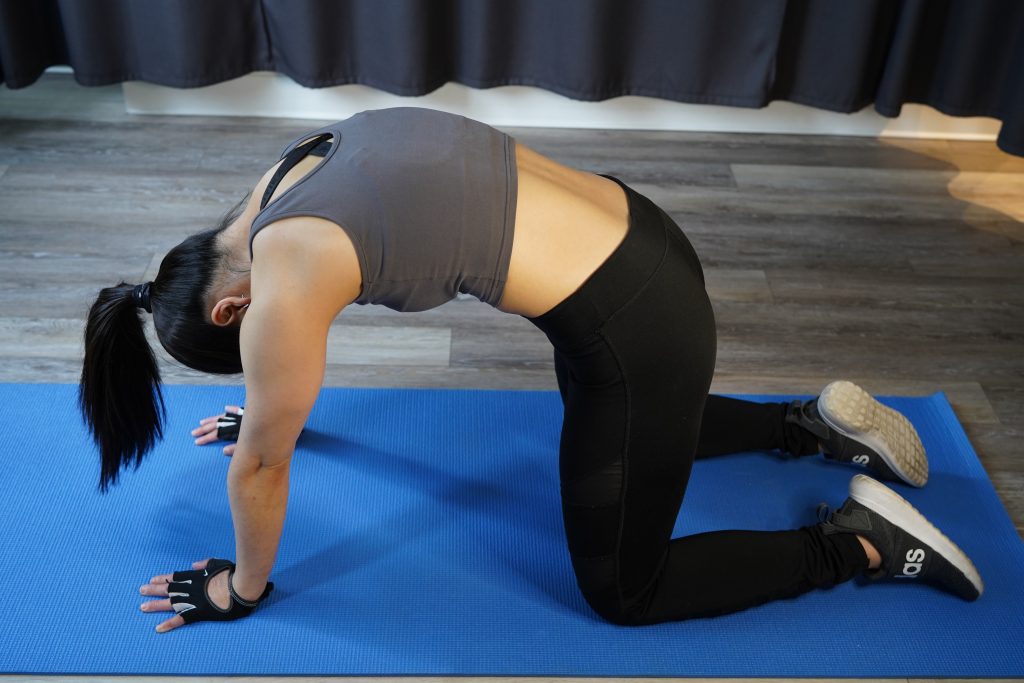
Tuck your head and tailbone in. Arch your spine by pushing your mid-back towards the sky. Take a big breath in and expand your rib cage at the same time.
Step 3 (Cat):
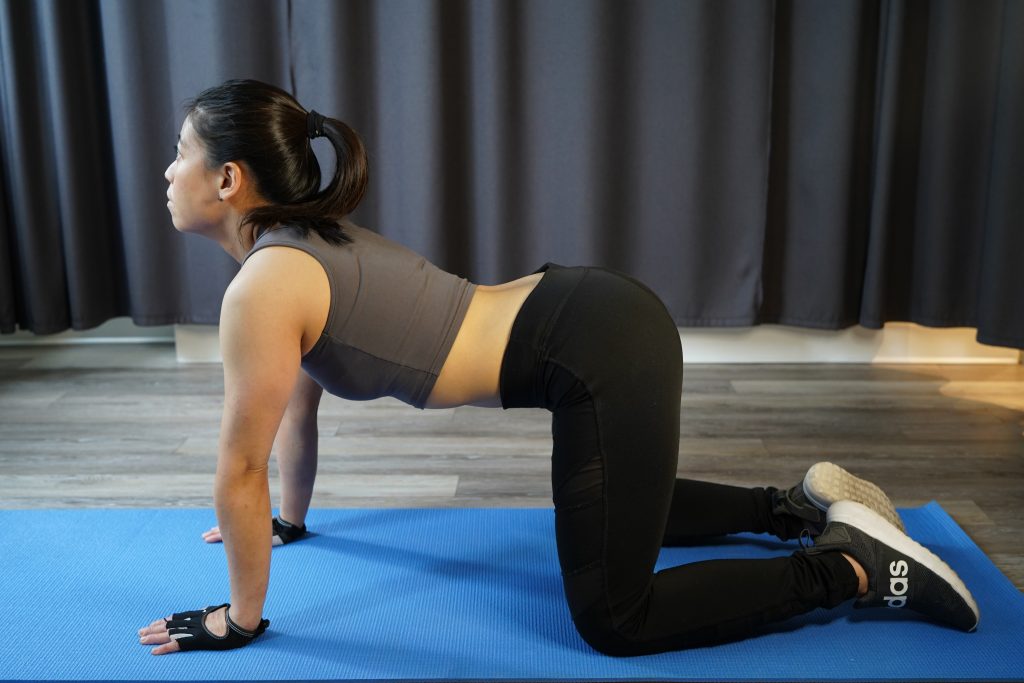
Sink your belly button towards the floor and tilt your head up at the same time. Stick your tailbone out to make a curve with your spine. Take a big breath out at the same time.
How often?
Repeat the cycle 30 times. Once in the morning. Once at night.
Keys to success:
- Camel — focus on rounding the back toward the sky.
- Cat — focus on dipping the belly button low, but don’t overdo it.
Common mistakes when performing the exercise:
- Many people perform this exercise too fast. It should be gentle and calm.
- During the cat phase, people dip their belly button too low, which can cause lower back pain.
3. Glute Bridges
Purpose
Target gluteal and hamstring muscles, improving core stability.
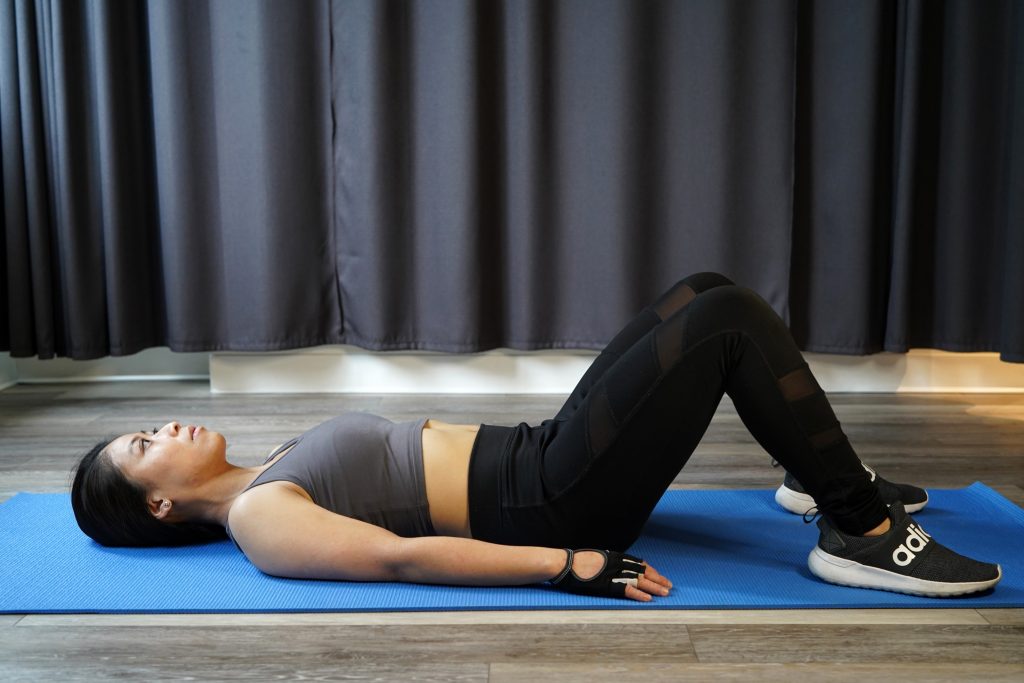
Step 1 (Set Up):
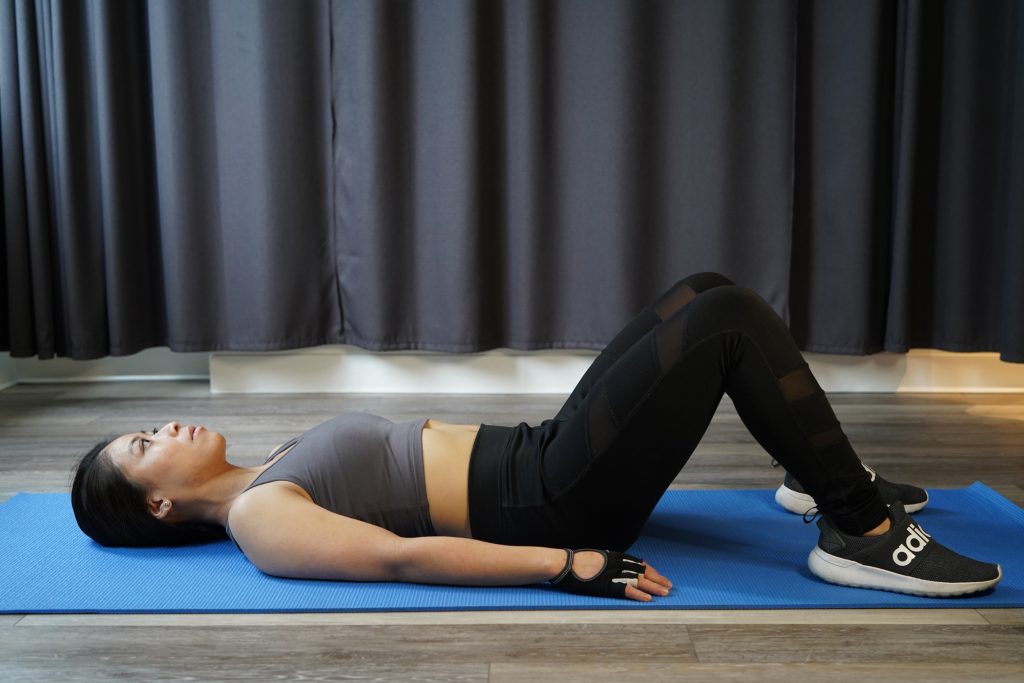
Lie face-up with knees bent and feet flat on the ground. Keep your arms relaxed by your side.
Step 2 (Lift and Squeeze):
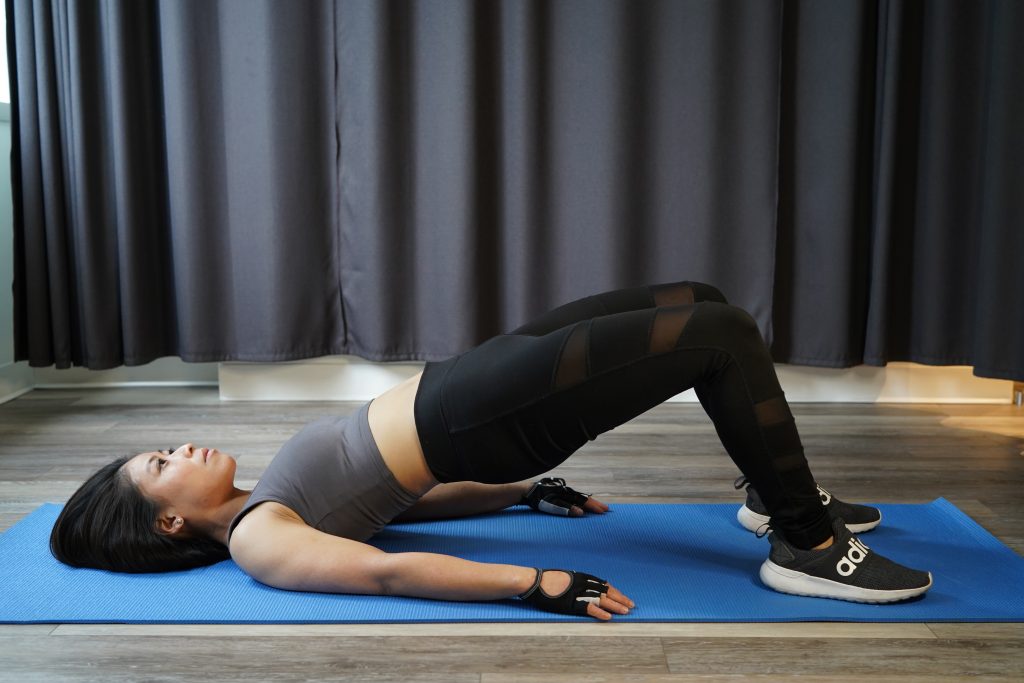
Lift your hips off the ground, creating a straight line from your shoulder to your hips to your knees. Squeeze your glutes (butt) behind you when lifting your hips.
Step 3 (Reset):
Once the rep is complete, return to the original position by lowering your hips to the ground.
How often?
Hold for 7 seconds. 10 reps x 3 sets. Daily.
Keys to success:
- Remember to squeeze the glutes together while lifting and also squeeze at the top.
Common mistakes when performing the exercise:
- People push their hips too high, causing arching in their back.
- People forget to squeeze their glutes.
4. Hip Flexor Stretch
Purpose
Target the psoas muscle to stretch out the tension so that it doesn’t pull on the lower back region.
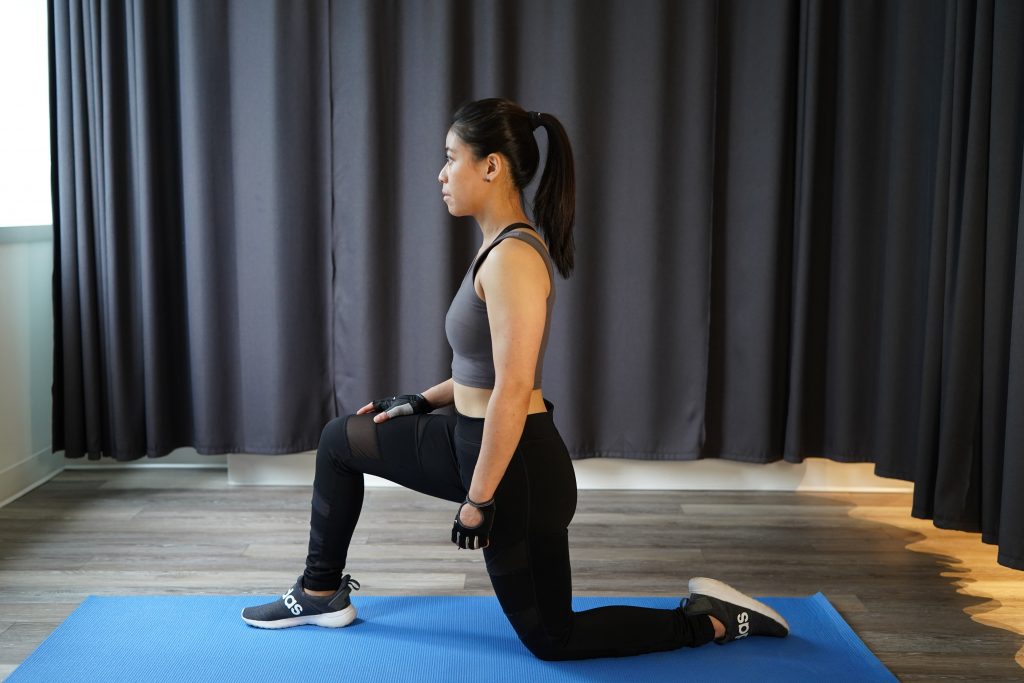
Step 1 (Set Up):
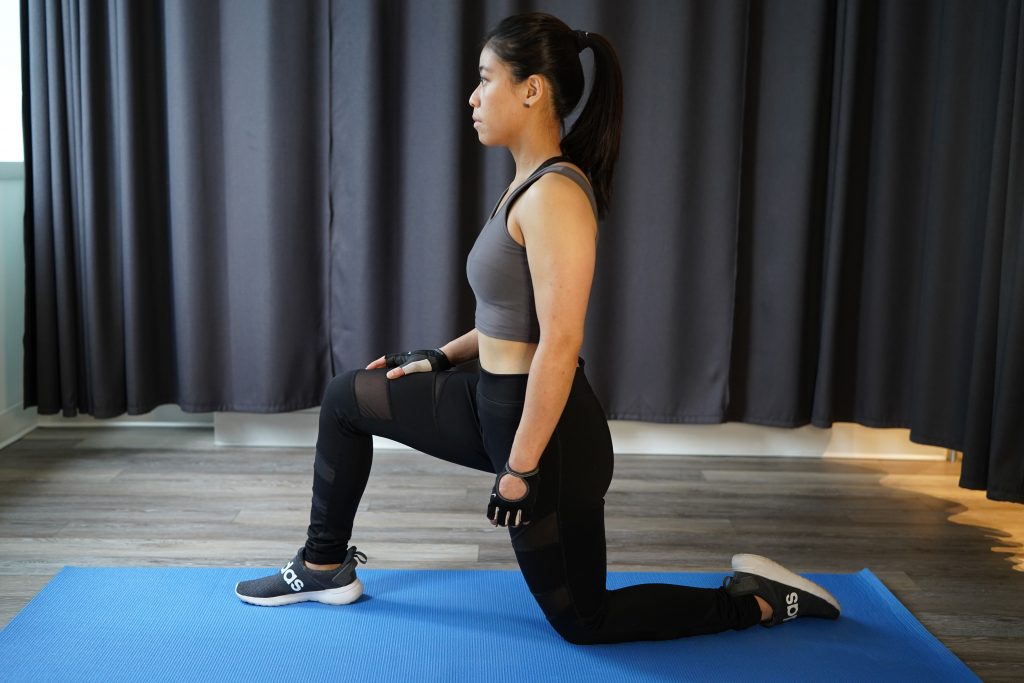
Start in a lunge position with one knee down. Your opposite knee is forward and bent at approximately 90 degrees.
Step 2 (Drive) :
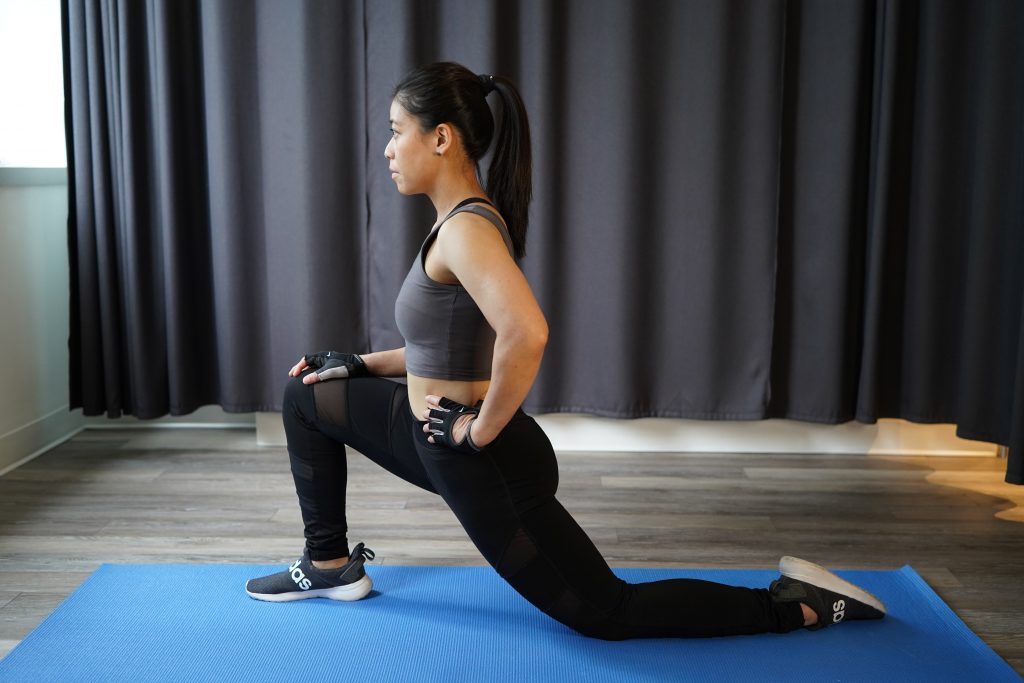
Maintain a neutral/straight back. Lean and drive your hip forward while squeezing your glutes.
(Optional):
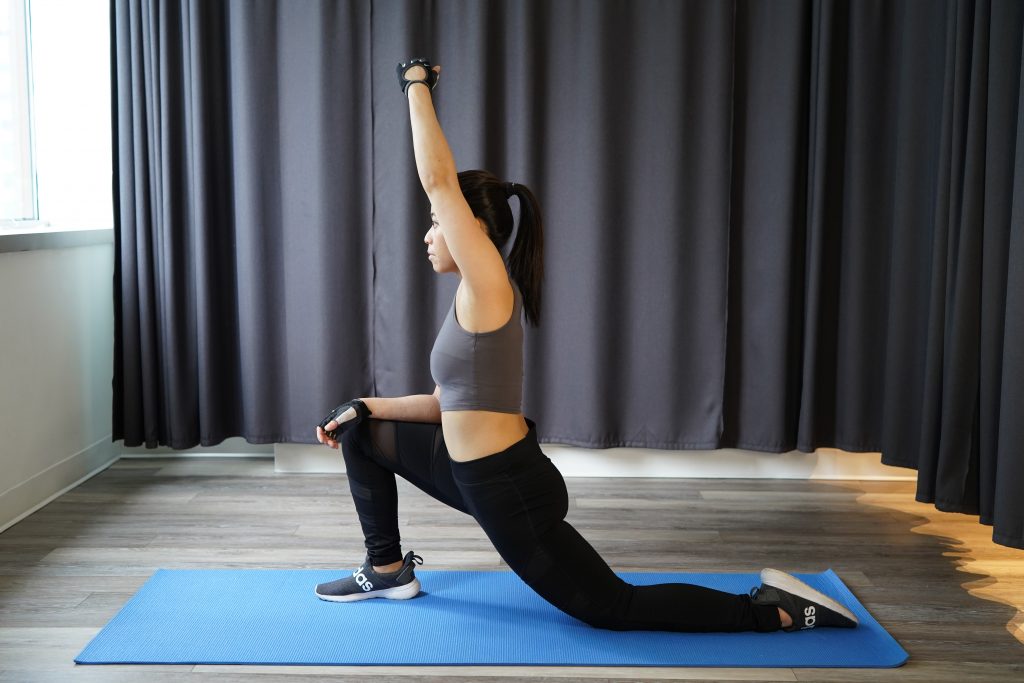
You can raise your arm on the side of your lowered knee to get a deeper stretch.
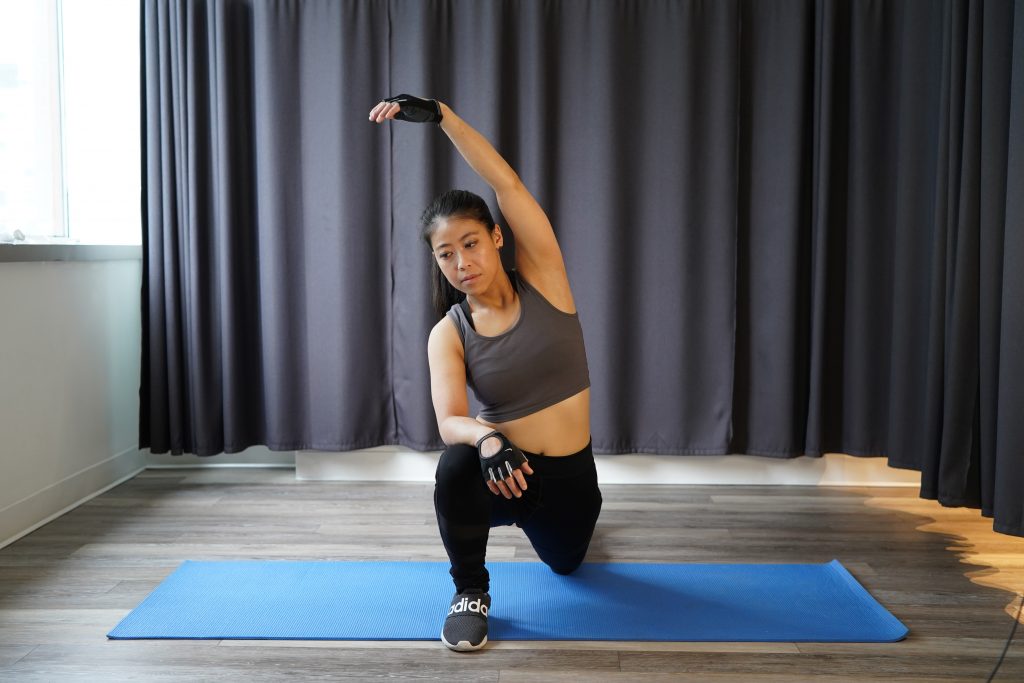
You can lean your torso away from your stretching leg to get a deeper stretch.
Step 3 (Reset):
Once the rep is complete, return to the original position and repeat on the other side.
How often?
Hold for 30 seconds x 3 reps. Daily.
Keys to success:
- Don’t think of leaning forward during the lunge.
- Instead, think of lowering your hips toward the floor.
Common mistakes when performing the exercise:
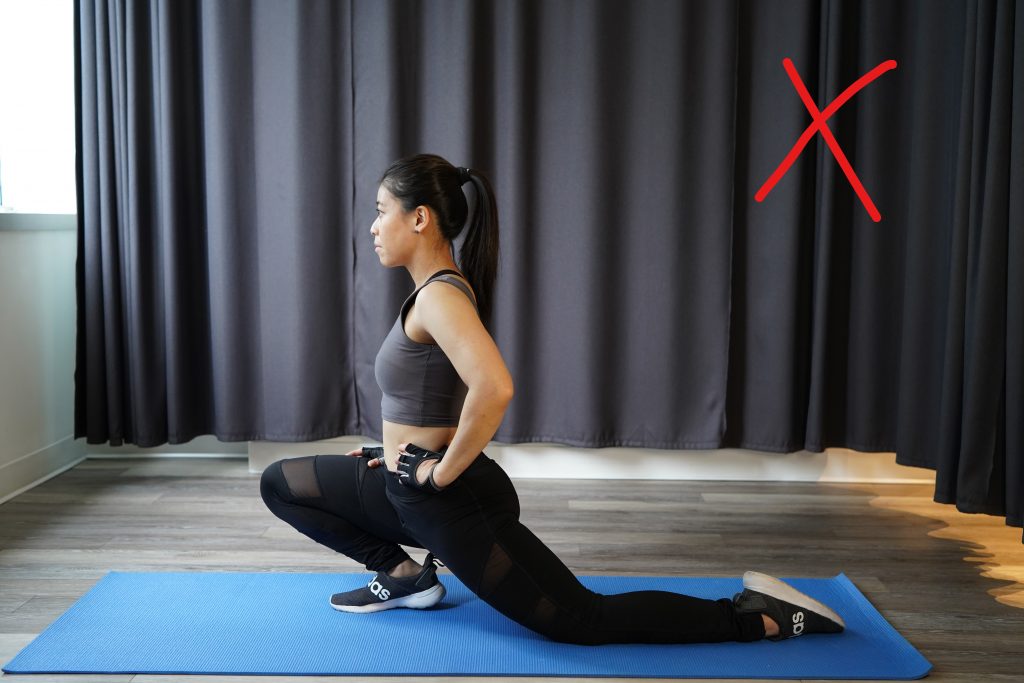
People don’t step forward enough with the opposite leg during the lunge.
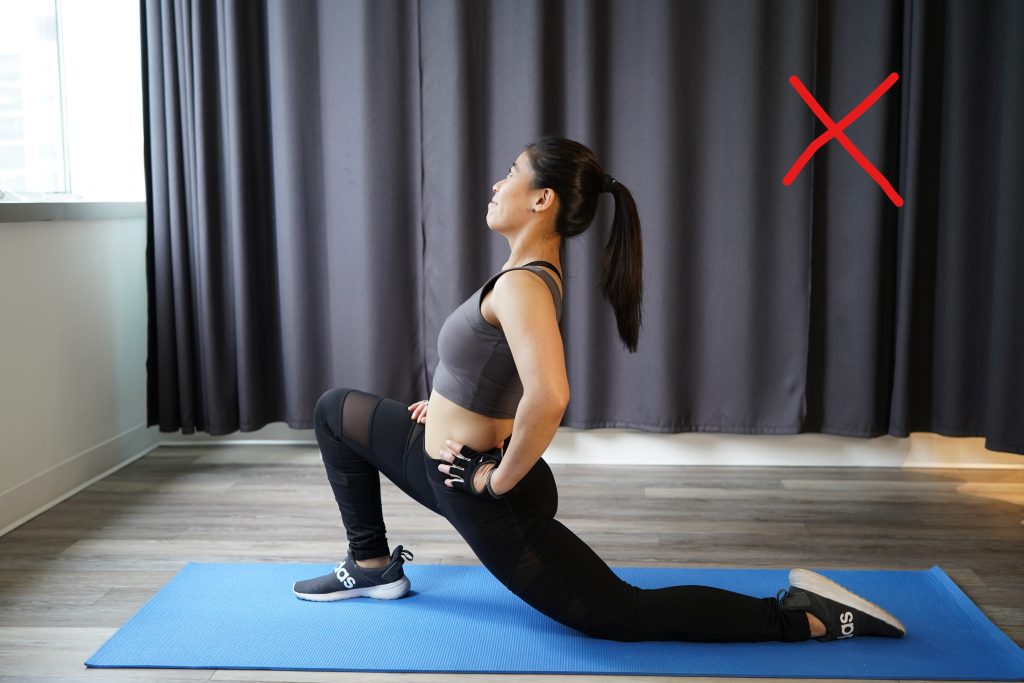
People lose their neutral spine and lean back too much.
5. Side Plank
Purpose
Target oblique muscles along with gluteus medius and gluteus maximus to improve core stabilization.
Step 1 (Set Up):
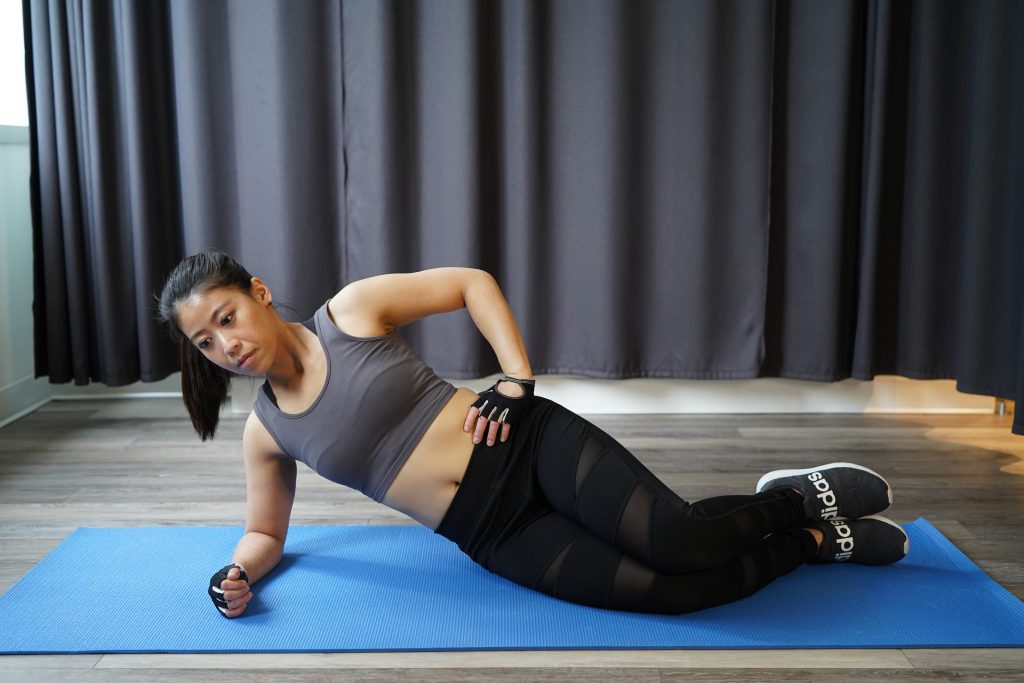
Lie on your right side. Stack your legs on top of each other. Knees are bent at 90 degrees. Your right elbow should be directly under the right shoulder. Your forearm should be flat on the ground.
Step 2 (Lift):
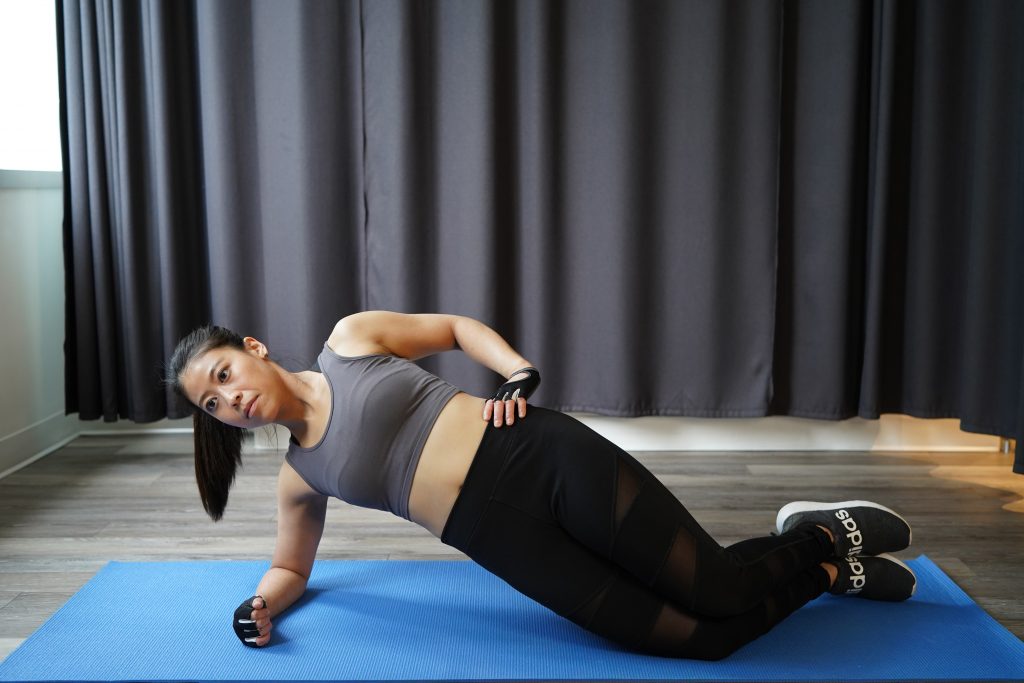
Lift your hip off the ground and drive it forward. You should now be on your elbow/forearm, creating a straight line from shoulders to hips to knees. Once the rep is complete, return to the original position by lowering your hips to the ground. Repeat on the other side.
How often?
Hold for 7 seconds. 10 reps x 3 sets. Daily.
Keys to success:
- Keep the knees stacked while thinking about driving your hips forward, not upwards.
- Squeeze your glutes together.
Common mistakes when performing the exercise:
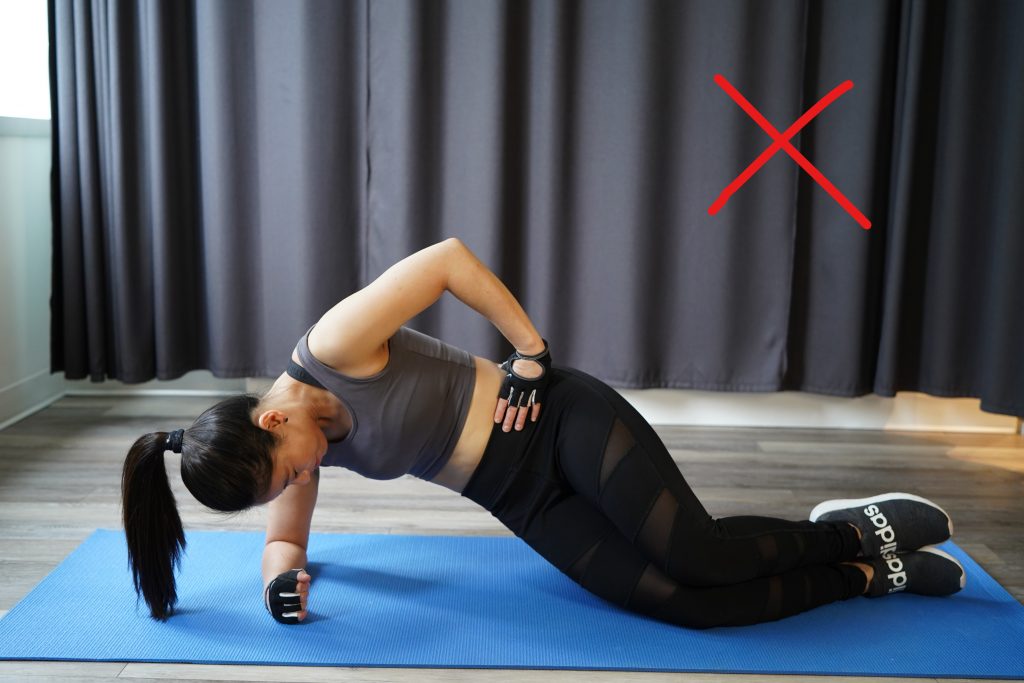
People fold their chest inwards towards the hips during the lift.
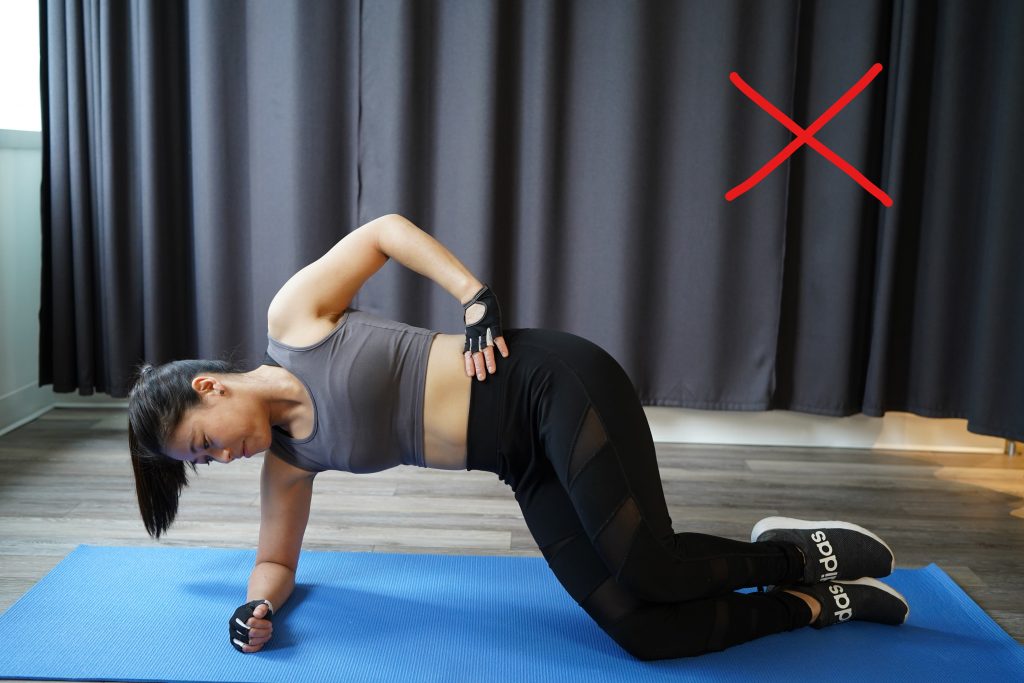
People lift their hips toward the sky rather than drive the hip forward to create a straight line.
Sustainable Lifestyle Changes for a Pain-Free Lower Back
Hopefully, these physiotherapy exercises for lower back pain helped you relieve some pain. There are also easy lifestyle changes you can make for sustainable long-term health.
Avoid sitting continuously for over one hour at a time. Any movement is better than not moving at all.
Even if you are sitting with perfect posture for a long period of time, try to get up and move around.
Your back will thank you.
Other Common Problems and Fixes
1. Poor desk ergonomics
Have the issue reviewed by a practitioner knowledgeable about ergonomics such as a physiotherapist or chiropractor.
2. Un-supportive mattress
Talk to a physiotherapist, chiropractor, or registered massage therapist (RMT).
3. Daily routine constantly reinforces lower back pain
Talk to any of our professional health service providers to take a look at those specific factors.
4. An existing issue in the muscle (strain, knots), joint (restricted, irritated), or nerve (inflamed, blocked)
This must be individually looked at by a health practitioner such as:
- A chiropractor, for sharp lower back pain due to joint and nerve pain.
- A physiotherapist, to strengthen the lower back for better core stability and mobility.
- An acupuncturist, for muscle tension and nerve pain.
- An osteopath, for joint and muscle stiffness.
- An RMT, for lower back muscular stiffness and tension.
We look forward to your swift recovery. Say goodbye to your lower back pain for good.